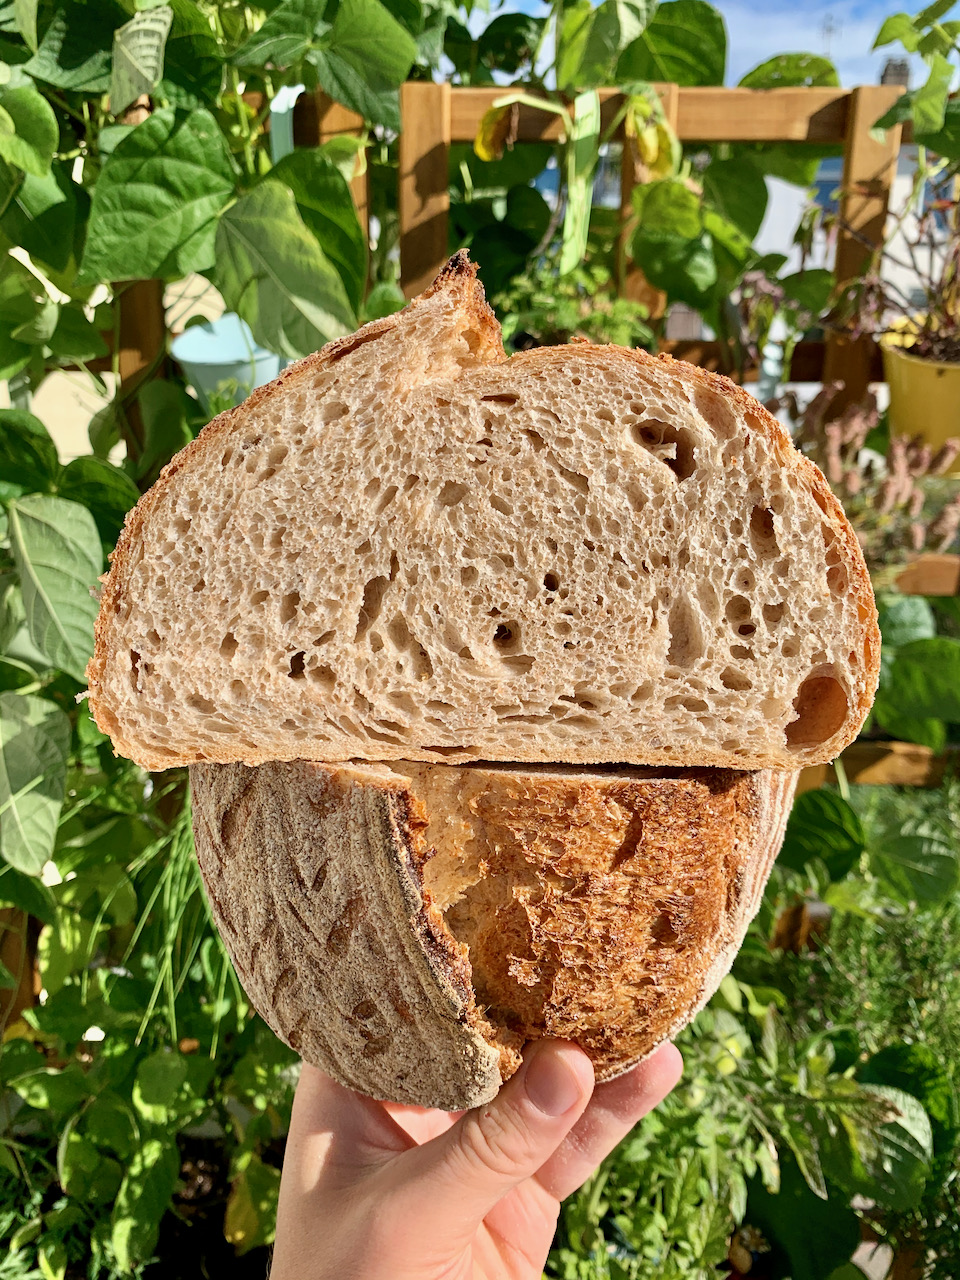
 The Bread Code Sourdough
 Serves Serves |  Total Time Total Time |
|---|---|
| 1 loaf | 14.85 hours |
 Ingredients
 400 g (80%) bread flour
- 100 g (20%) whole wheat flour
 325 g (65%) water
 100 g (20%) starter
- 10 g (2%) salt
 Cookware
- 1 bowl
- 1 cylindrical shaped container
- 1 Dutch oven
- 1 cooling rack
 Instructions
Autolyse
Step 1
At night, mix bread flour, whole wheat flour, and water in a bowl, fully hydrating the flour. Let it rest, covered, at room temperature over night for 12 hours. Make sure that there are no crumbly parts of flour left.
Bulk Fermentation
Step 2
The next morning, add the active starter to the main dough.
Step 3
Add the salt to the main dough.
Step 4
Mix until everything is nicely homogenized (very important).
Step 5
For me this takes around 1 minute. It might take you up to 5 minutes.
Step 6
You want to make sure the sourdough starter has been evenly spread across the dough.
Step 7
Let the dough sit for another 15 minutes covered.
Step 8
Now remove the dough and place it on your bench (no flour!)
Step 9
Extract a small sample from the dough and place it in a cylindrical shaped container. A shot glass works, or anything else that has a cylindrical shape. This sample will tell us exactly when the dough is done bulk fermenting. Mark the dough with a rubber band or a marker. This way we can see the size increase.
Step 10
Let the dough sit for another 15 minutes covered.
Step 11
Proceed with kneading the dough on the bench. It’s important that you have no flour on the surface.
Step 12
Pull the dough as far out as you can, without tearing it.
Step 13
Fold over the dough to glue itself together.
Step 14
Repeat once from each side.
Step 15
Drag the dough over the surface using your hands at a 45° angle.
Step 16
This only works because the dough is stuck on the surface.
Step 17
Your dough ball should become nice and round.
Step 18
Wait a minute, repeat the same process 3 times.
Step 19
Add dough to container and wait 2 hours or until the dough has doubled in size.
Step 20
Slightly wet hands with cold water.
Step 21
Release dough from sides of container.
Step 22
Using a very light touch, do a coil fold. Do 2 opposite sides, then 3rd side pull dough under and then 4th side roll it over.
Step 23
Return to container and cover and wait until the dough doubles in size.
Step 24
This can take anywhere between 4 and 12 hours. Every 2 hours, do the coil fold.
Shaping the Dough
Step 25
Prepare your banneton (if using) and very lightly flour counter/surface.
Step 26
Flip dough out onto it. Do letter fold and stick dough together. Pinch ends closed (for oval loaf). Pinch bottom seam together, for more tension (for boule).
Step 27
Lightly sprinkle flour over top (and rice flour along sides of banneton, to prevent sticking).
Proofing Stage
Step 28
Will take 2 to 4 hours at room temperature (until the finger poke test is passed). Place shortly before the finger poke test passes in the freezer for 45 minutes to make scoring easier.
Step 29
Or - place for 1 hour at room temperature, then another 6 to 24 hours in the fridge. This way your bread will be ready directly for breakfast.
Baking
Step 30
Preheat oven at 450°F for maximum for at least 30 minutes.
Step 31
If using Dutch oven, heat it in the oven for about 30 minutes (lid separated).
Step 32
If baking on sheet or stone, heat stone and sheet while heating oven.
Step 33
Also heat the container (e.g. cast iron skillet) at the bottom of the oven to use to create steam).
Step 34
Place inverted baking tray (with sides) on uppermost rack of oven after putting in bread, to catch the steam. At 30 minutes, remove this tray and the water container.
Step 35
Gently turn dough out of banneton onto parchment, or directly into hot dutch oven (careful!).
Step 36
Score dough to control where you will have oven spring. This takes a few attempts. You can practice this when you initially kneaded and made a smooth ball.
Step 37
Place in Dutch oven or on baking stone or sheet.
Step 38
Bake for 30 minutes covered.
Step 39
Remove lid of Dutch oven or remove top inverted tray and water container (if using).
Step 40
This makes sure we no longer have steam. That way you will develop a nice crust.
Step 41
Bake for 15 to 20 minutes more until your bread has your personal desired color.
Step 42
It is ready when the core temperature reached 203°F.
Resting Stage
Step 43
Let the bread cool on a cooling rack for at least 2 hours.
 Source